# posh-git
posh-git is a PowerShell module that integrates Git and PowerShell by providing Git status summary information that can be displayed in the PowerShell prompt, e.g.:
C:\Users\Keith\GitHub\posh-git [master ≡ +0 ~1 -0 !]>
posh-git also provides tab completion support for common git commands, branch names, paths and more.
For example, with posh-git, PowerShell can tab complete git commands like checkout by typing git ch and pressing
the tab key. That will tab complete to git checkout and if you keep pressing tab, it will
cycle through other command matches such as cherry and cherry-pick. You can also tab complete remote names and
branch names e.g.: git pull or<tab> ma<tab> tab completes to git pull origin master.
More information can be found at https://github.com/dahlbyk/posh-git (opens new window)
# Installation
Installing posh-git can be a bit daunting. Just make sure to read the instructions carefully.
# Prerequisites
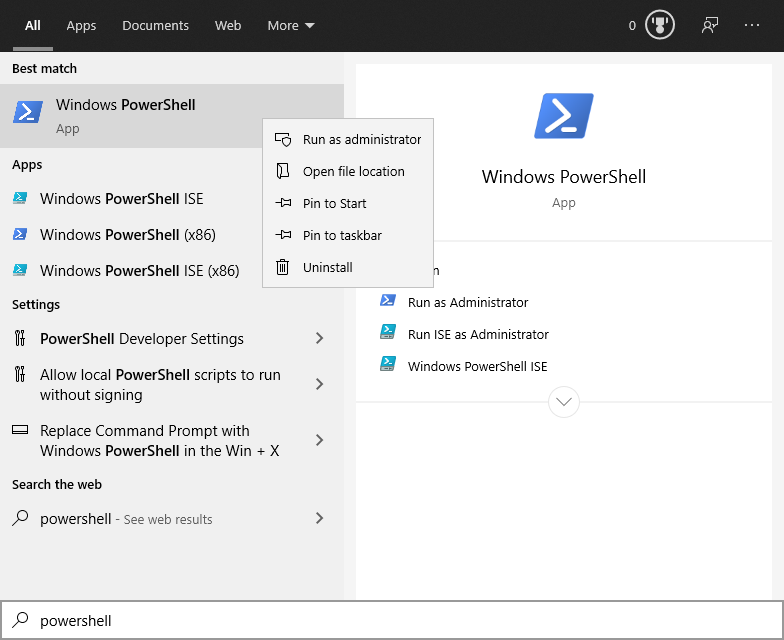
Open an elevated PowerShell window by searching for PowerShell in the start menu, right clicking the Windows PowerShell item and selecting Run as Administrator as shown the next screenshot.
Before installing posh-git make sure the following prerequisites have been met.
- Windows PowerShell 5.x or PowerShell Core 6.0.
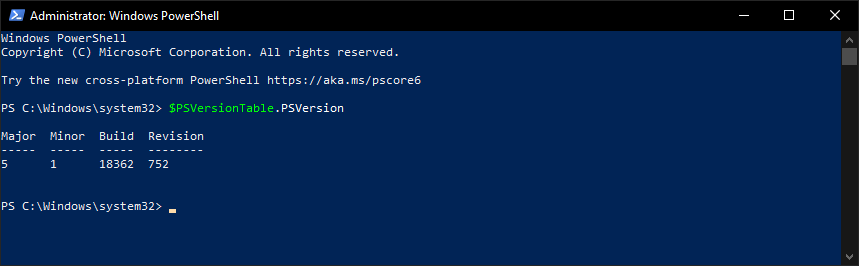
Check your PowerShell version by executing
$PSVersionTable.PSVersion.
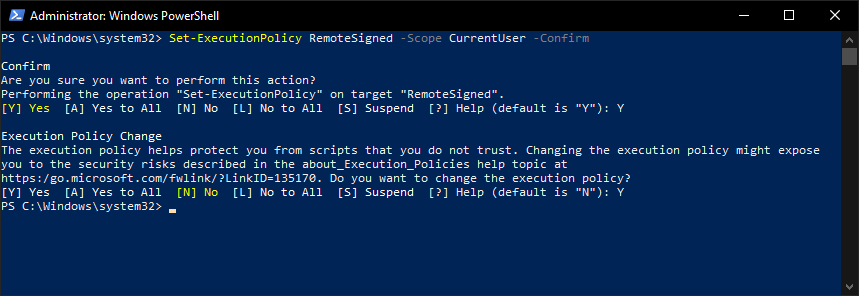
- On Windows, script execution policy must be set to either
RemoteSignedorUnrestricted. This can be configured by executing the following command and allowing both policies by selectingYes:
Set-ExecutionPolicy RemoteSigned -Scope CurrentUser -Confirm
- Git must be installed and available via the PATH environment variable.
Check that
gitis accessible from PowerShell by executinggit --versionfrom PowerShell.

If all pre-requisites have been met, you are ready to install posh-git.
# Installing posh-git via PowerShellGet
Execute the command below to install posh-git from the PowerShell Gallery (opens new window):
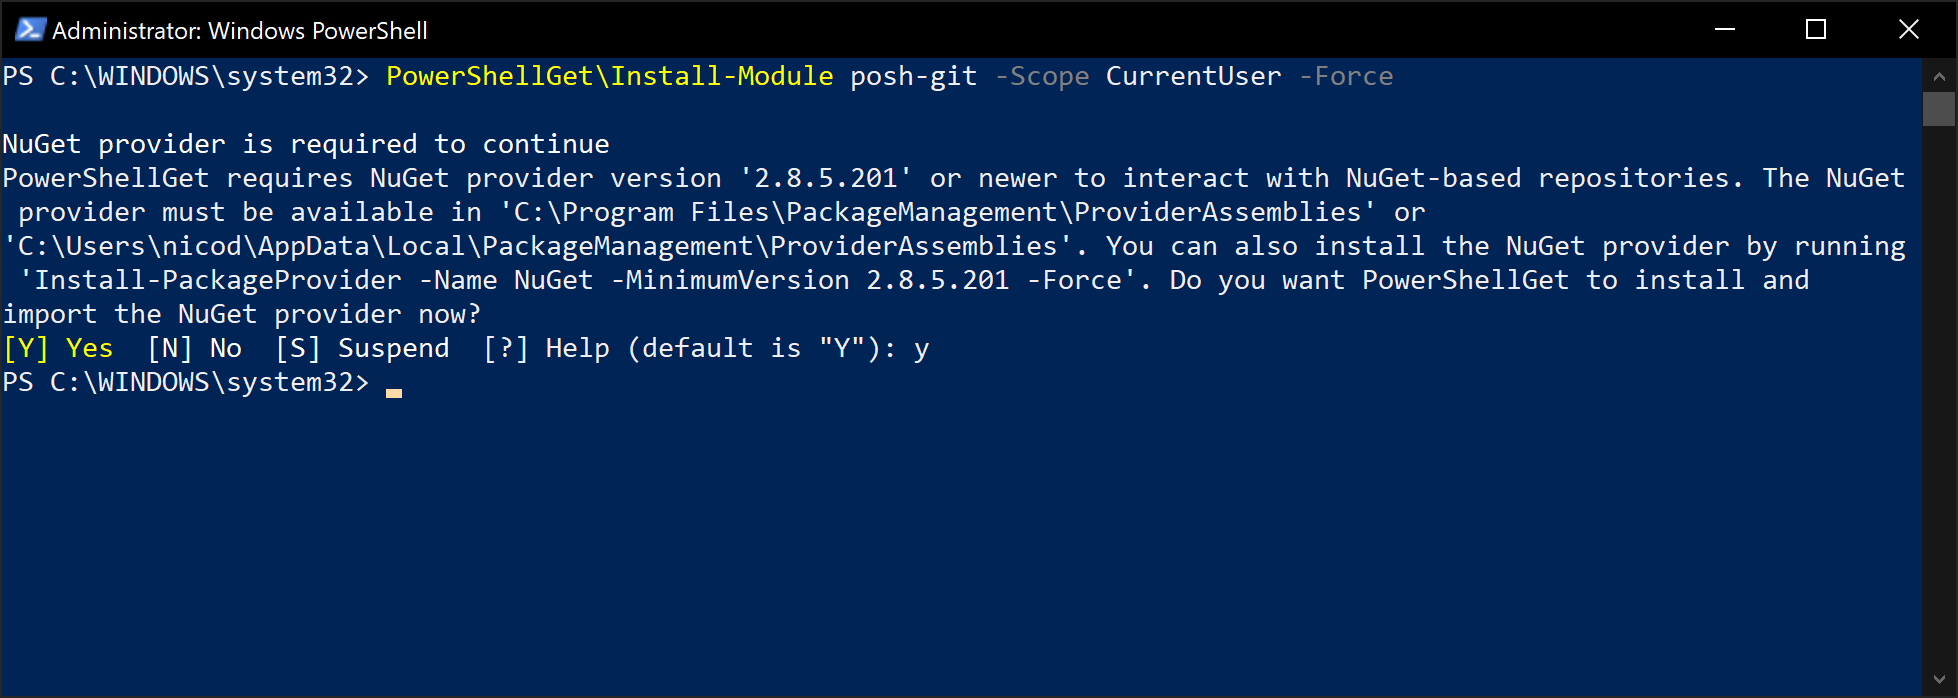
PowerShellGet\Install-Module posh-git -Scope CurrentUser -Force
You may be asked to install the NuGet package manager before continueing. Answer Yes to allow installation of this module to proceed.
# Using posh-git
After you have installed posh-git, you need to configure your PowerShell session to use the posh-git module.
This can be easily achieved by issueing the command:
Add-PoshGitToProfile
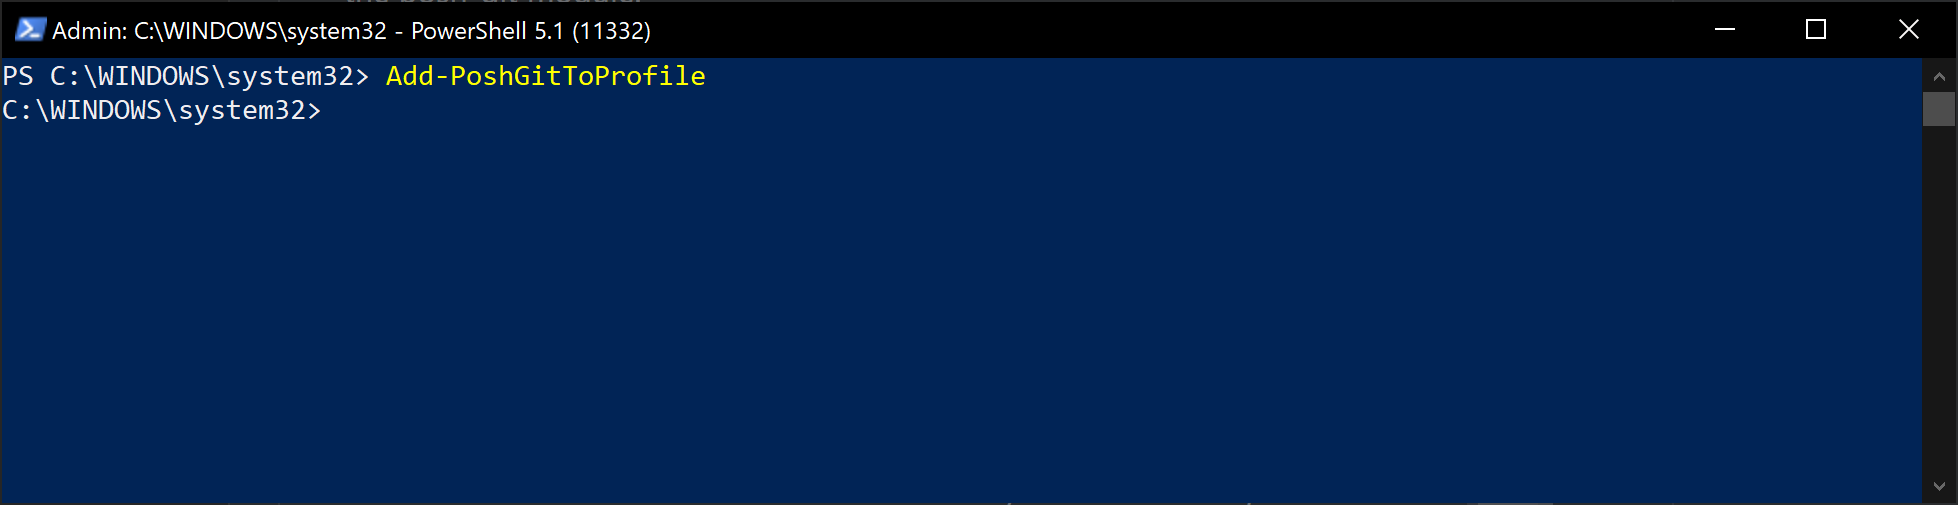
You can now close the elevated PowerShell window.
# Testing installation
Start by opening a new File Explorer and navigating to a location where you can create a test project. For example your documents or desktop.
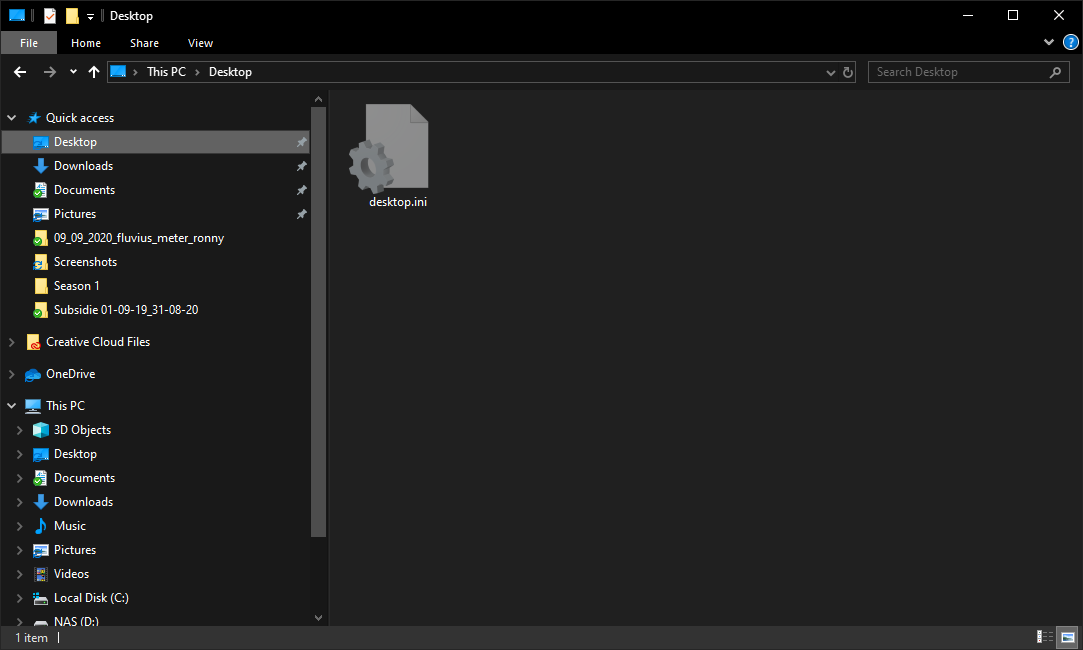
Now open a PowerShell window in that location by selecting Open Windows PowerShell from the file menu in the upper left corner of the File Explorer app.

TIP
You can also open a PowerShell window in any directory by holding down shift while right-clicking on a directory. Then choose the option Open PowerShell window here.
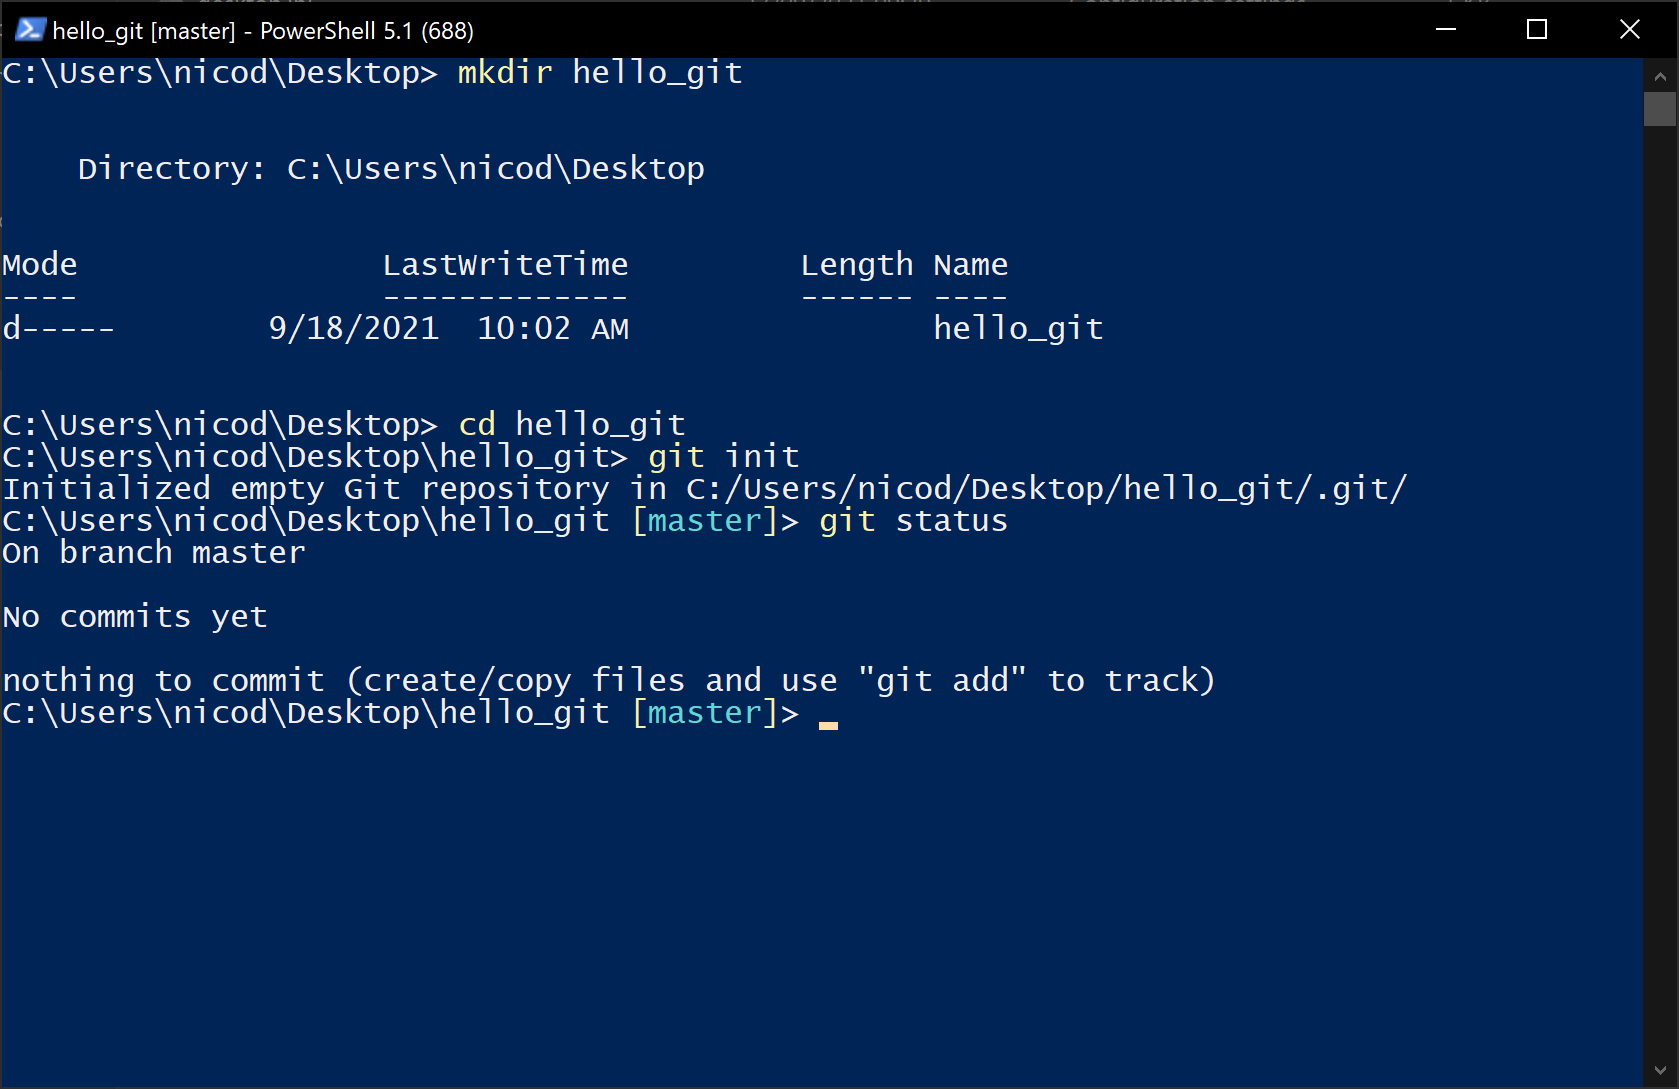
Create a directory and initialize a git test repository with the following commands:
mkdir hello_git
cd hello_git
git init
Now if you execute a git status you should see some posh-git magic as shown below:
You are all good to go now.